Tashulia
DIY Garden Eco-Friendly Eggsperiment
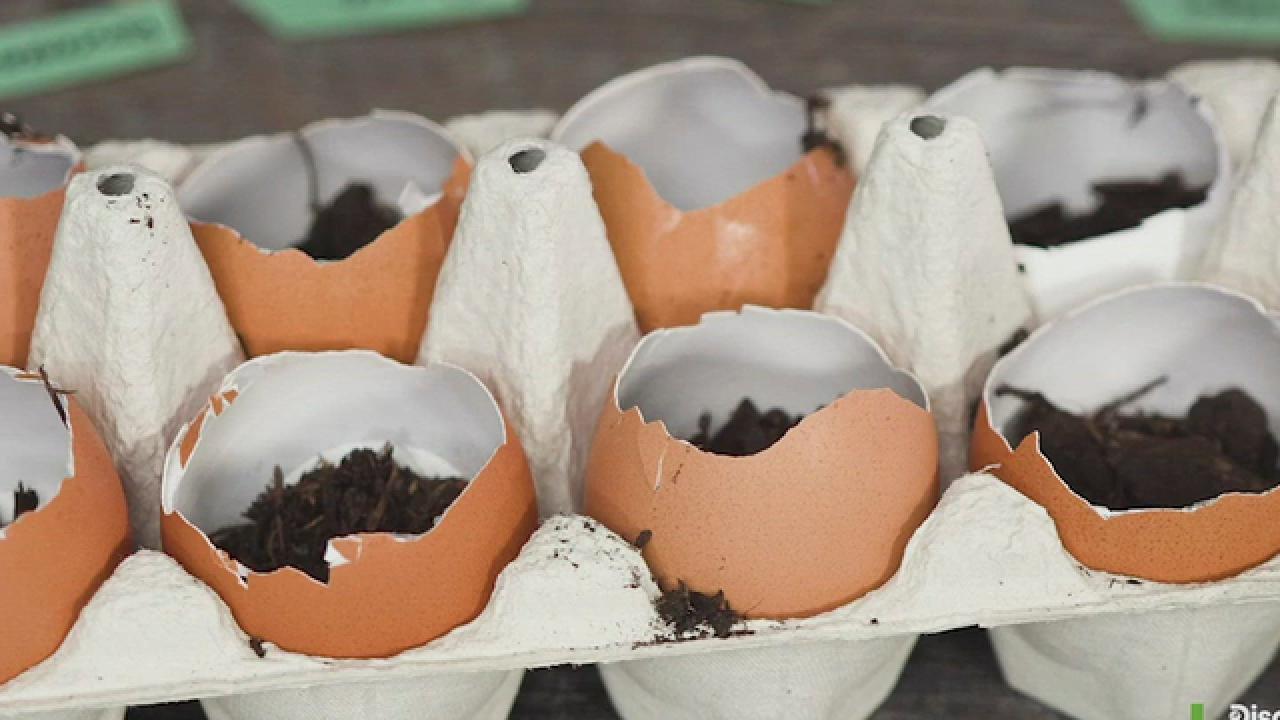
Looking for a fun, educational, and zero-waste DIY project? Try creating a mini-garden using a convenient kitchen scrap: egg shells!
Instead of tossing the egg shell after your next omelet, why not try creating a zero-waste mini garden? This fun, educational DIY project is a good way for younger greenthumbs to get in on the action from the comfort of your home.
Step 1: Preparation

Elva Etienne
After using your eggs, make sure to wash any leftover bits with water. If you did not crack the egg perfectly, it is okay - as long as there is enough unbroken (at least half) for planting. If you are collecting the eggs over time, you can put the clean, dry eggs in the freezer in an empty egg carton until you are ready for the project.
At this point, also gather your other items for the project. Here is a breakdown of what you need:
- Egg carton: Another way to recycle! This is a great way for your egg carton to find a second use as a container for all growing seedlings.
- Egg shells
- Potting Mix (Or Soil) While you can use commercial potting soil (which traditionally is just topsoil), if possible, try for a seedling starter mix. This will give your seedlings the best possible chance to grow.
- Seeds
- Spoon For scooping the dirt
- Small Spray Bottle For watering the plants
- Marker
If you wish to decorate your eggs, you should do so after washing but before adding soil. Get creative! Draw silly faces and the new seedlings will look like hair. Continuing with the zero-waste theme, you can use a permanent marker to label what each seedling is on the shell itself. But, you can also create your own decorative labels with paper for your personal perfect window garden aesthetic.
Step 2: Soil

Jose A. Bernat Bacete
Use your spoon to carefully add soil to the inside of the eggshells. Try to make sure the soil almost fills the egg. Leave a little room!
With your spray bottle, mist the soil so that it is moist but not drenched. Please take care not to overwater your seedlings as they grow. Since the egg shell is self-contained, there is no drainage for extra water. Using the spray bottle helps prevent oversaturation, which can drown and suffocate the new roots.
Step 3: Seeds
If you are new to gardening, or a seasoned black thumb, you should try starting with hearty herbs. Basil, cilantro, and mint are good options for first-time gardeners.
Add 2-3 seeds per shell. Once the seeds are added, gently top up each egg with a little soil as needed. Make sure to check seed packets for specific planting depths. Mist again if needed so that topsoil is slightly moist.

Petra Flaccus / EyeEm
Step 4: Care

Elena Zakharova / EyeEm
Leave your egg carton of seedlings in a sunny, south-facing window. Water as necessary (typically every other day) so that the soil remains slightly wet but not drenched.
Step 5: Growth and Transplantation

As your seedlings sprout, they will begin to crowd each other. Parse down to one by using scissors to trim seedlings to the soil line. You do not need to pull them out, as this can disturb the soil and damage the roots.
Check your seedlings often. If you don’t see anything right away, don’t fret. Seeds first grow down as roots. Next, a green sprout will shoot up with either one or two leaves as the seedling develops its root system. After these leaves, the next set of “true” leaves will grow. It is at this point when your seedlings are ready to transplant.
Create a hole in the bottom of the eggshell (a gentle tap on a hard surface can crack the egg, using your hands to remove extra pieces) and place whole in your prepared container or garden bed. Don’t worry about the egg shell! It will biodegrade over time and provide additional nutrients to your plants!


